1. Disable any WordPress plugins or themes that you recently installed

Key steps
- Log into your WordPress Dashboard.
- Go to the “Plugins” page.
- Find the newly installed plugin you want to disable and click on “Deactivate”
- To disable a theme, go to “Appearance” page and click on “Themes”.
- Find the theme you want to deactivate and click on the “Disable” link.
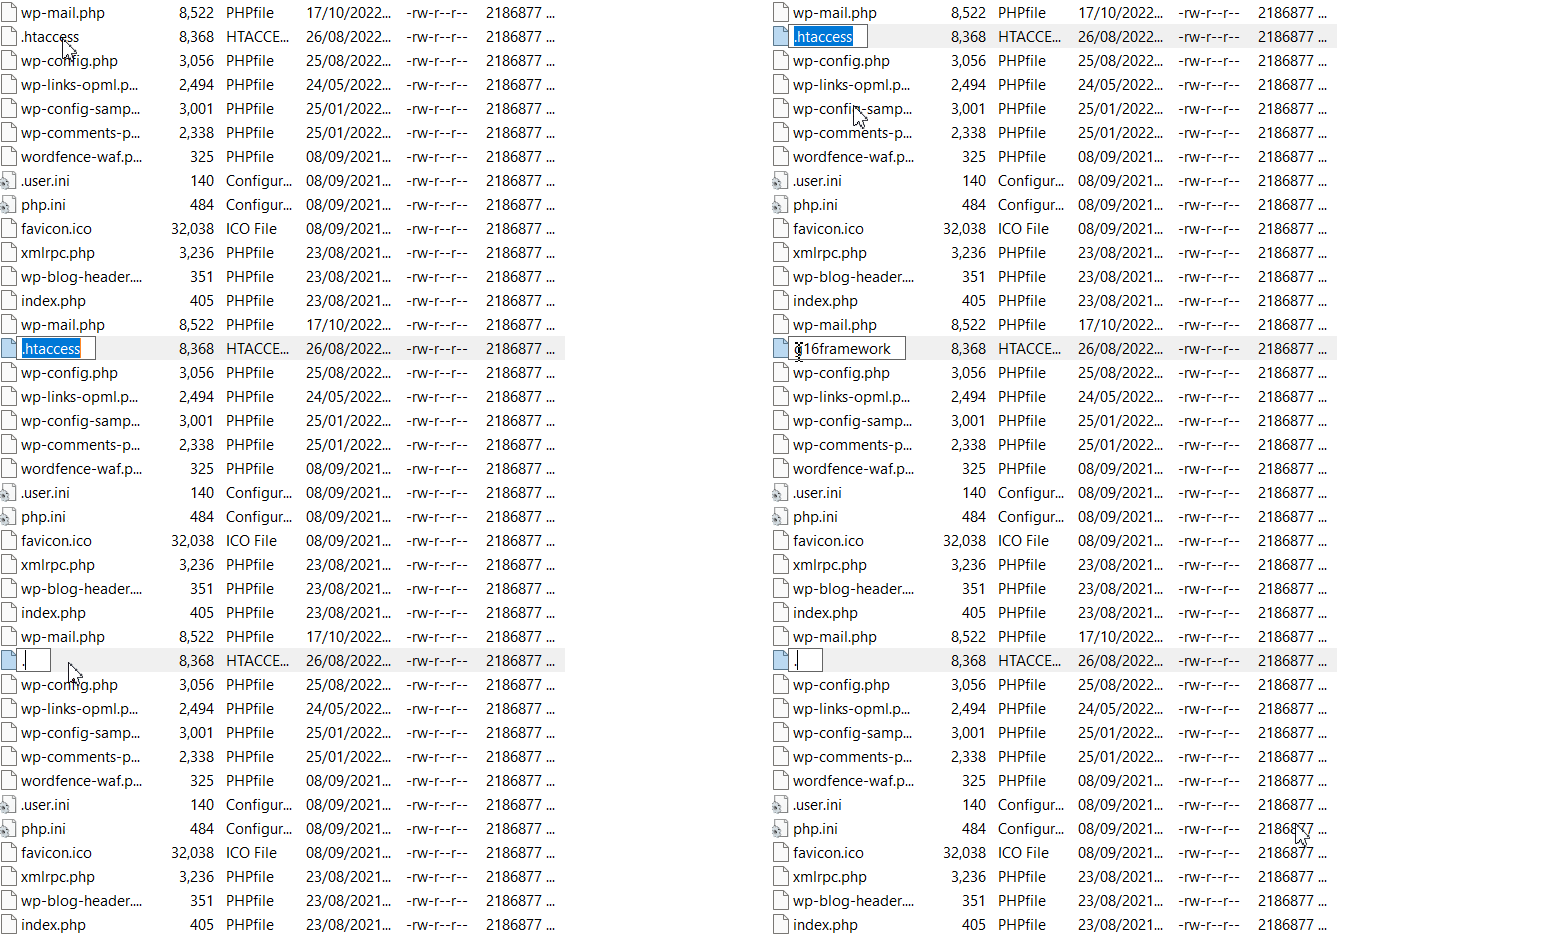
2. Rename the .htaccess file, if one exists

Follow these simple steps
- Open the file manager in your web hosting platform.
- Search your site’s root directory for the .htaccess file.
- Select the .htaccess file and right-click on it to open its properties.
- Click on the “Name” field and enter a new name for the file.
- Click “Save” or “OK” to confirm the changes.
- Refresh your website to see if the name change has been successfully applied.
3. Use an FTP client or file manager in your hosting control panel to access and rename the active theme in /wp-content/themes/

Follow these steps to fix the problem related to theme
- Log into your hosting control panel.
- Look for an FTP client or file manager application and click on it.
- Use the application to locate the active theme folder in /wp-content/themes/.
- Click on the theme and you should see an option to rename it.
- Enter some new name for the theme and click “rename” or “ok” to save the changes.
4. Re-upload the WordPress core files from a fresh download of WordPress

Try these steps:
- Download the latest version of WordPress from the official WordPress website.
- Unzip the folder to your computer, or FTP the folder to your server.
- Backup your WordPress database. This can be done through plugins like UpdraftPlus, or through phpMyAdmin hosted in your cPanel.
- Using an FTP program, delete all the files and folders in your existing WordPress directory except wp-content, wp-config.php, and .htaccess (if present).
- Upload the contents of the WordPress folder you downloaded to your server.
- Copy the database backup you made before and replace the tables in your existing database.
- Test your site by visiting the home and admin URL to make sure everything is functioning properly.
5. Check the error_log file for any PHP errors
Try the following steps:
- Locate the error_log file. This is typically found in the /var/log directory of the web server.
- Open the error_log file with a text editor.
- Search through the log for any errors related to your PHP code.
- If you find any errors, check the code in question to see if it needs to be corrected or improved.
- Repeat steps 2-4 until all errors have been resolved.
6. Verify that your site’s database has the correct database prefix
How it works?
- Check the settings of your database: It is important to look at your site’s database settings, and make sure that the correct prefix is set. This can usually be done through the settings of your hosting platform.
- Search for the database prefix in your source code: You can use a code editor to search your source code for the database prefix. It is important to remember that the prefix should be used in all queries, so if it is missing anywhere it needs to be added.
- Check the database login details: You should be able to find the database login details in the settings of your hosting platform. Make sure the login username and password are correct, and the database prefix is being used correctly.
- Review the database tables: Make sure there are no tables in your database with the wrong prefix. You should be able to do this by checking each table name to make sure it begins with the correct prefix.
- Test a query: This will ensure that your queries are using the prefix correctly. You can run simple queries, such as SELECT and UPDATE, to make sure the prefix is being used correctly.
7. Increase the memory limit allocated to PHP
Follow one of these steps to fix the related problem
- Edit the php.ini File
You can increase the memory limit allocated to PHP by editing the php.ini file. Depending on the hosting provider, you may find the configuration file in the /etc or /usr/local/etc directories. Look for the following lines in the php.ini file and adjust the memory_limit parameter:
memory_limit = 256M ; Maximum amount of memory a script may consume (128MB)
- Edit the .htaccess File
Another alternative is to edit the .htaccess file. This requires that the hosting provider has enabled .htaccess overrides. If so, you can use the following code to increase the allocated memory limit for PHP scripts:
php_value memory_limit 256M 8. Contact Your Hosting Provider
If neither of the above methods are possible, you will have to contact your hosting provider and request them to increase the memory limit for your account.
Save Time and Money: Get Professional Help With Our Services


